[spring] swagger-fox 연동하기
Swagger가 뭐지?
우리는 보통 swagger와 swagger-ui를 헷갈린다. 사실 swagger에서는 다양한 툴을 제공하는데, swagger-hub(깃헙처럼 다양한 api를 확인할 수 있다), swagger-ui 등을 제공한다. swagger-ui를 우리는 보통 swagger라고 부르기도 한다.
swagger는 open api specification과 연관되어있다.

Oepn Api Specification(OAS)는 Restful API를 위한 표준이다. Swagger Specification이라고도 하는 것 같다. Swagger는 이 표준을 준수해서 API를 만들고 소스코드 없이 이해 가능하도록 시각화하는 툴을 제공한다. 그것이 바로 swagger-ui이다.
swagger는 기술의 제약을 받지 않는다. node.js이든, spring이든 사용가능하다. 그 중에서 swagger-ui를 가져다가 spring에서 사용할 수 있도록 만든 framework가 spring-fox이다.
Swagger 버전
OAS(swagger)에는 1버전, 2버전, 그리고 가장 최신 버전인 3버전이 있다.
Swagger1과 2는 spring-fox라이브러리를 통해 사용햘 수 있는데, 오래전에 나온 라이브러리이며, 2020년 이후로 업데이트가 멈췄다.
최근에는 2019년에 SprignDoc OepnApi가 나왔는데, 더 간단하고 사용성이 좋다고 한다.
이번 포스팅에서는 spring-fox를 이용해서 swgger2를 적용해 볼 것이다.
(oepnApi는 다음포스팅에서...)
Swagger-fox 적용
프로젝트 생성
springboot 2.7
java11
gradle
Dependency
dependency를 적용한다.
implementation "io.springfox:springfox-boot-starter:3.0.0"
프로젝트를 돌려보면 에러가 날 것이다.
Failed to start bean 'documentationPluginsBootstrapper'; nested exception is java.lang.NullPointerException: Cannot invoke "org.springframework.web.servlet.mvc.condition.PatternsRequestCondition.getPatterns()" because "this.condition" is null
Spring boot 2.6버전 이후에 spring.mvc.pathmatch.matching-strategy 값이 ant_apth_matcher에서 path_pattern_parser로 변경되면서 몇몇 라이브러리(swagger포함)에 오류가 발생한다.
application.properties 에 아래의 내용을 추가해주면 에러를 해결 할 수 있다.
spring.mvc.pathmatch.matching-strategy=ant_path_matcher
application.yml에서는 아래와 같이 추가한다
spring:
  mvc:
    pathmatch:
      matching-strategy: ant_path_matcher
Controller만들기
Controller를 만들어보자. 테스트를 위해 두개의 package를 만들 것이다.
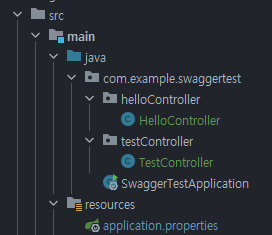
먼저 HelloController를 만든다.
@RestController
@RequestMapping("/hello")
public class Controller {
    @GetMapping
    public ResponseEntity<String> hello() {
        return ResponseEntity.ok("Hello SpringFox!");
    }

    @GetMapping("/double")
    public ResponseEntity<String> testDouble(@RequestParam(value = "test", defaultValue = "10") Double count) {
        return ResponseEntity.ok("Value " + count);
    }
}
TestController도 만든다.
@RestController
@RequestMapping("/test") //여기만 바뀜
public class TestController {
    @GetMapping
    public ResponseEntity<String> hello() {
        return ResponseEntity.ok("Hello SpringFox!");
    }

    @GetMapping("/double")
    public ResponseEntity<String> testDouble(@RequestParam(value = "test", defaultValue = "10") Double count) {
        return ResponseEntity.ok("Value " + count);
    }
}
잘 돌아가는지 localhost:8080/hello로 확인해보자
Hello SpringFox!가 뜨면 잘 돌아가는 것이다.
Swagger
우리가 dependency를 넣어주었으니, 별도의 설정 없이 자동으로 swagger가 설정되어있을 것이다. (starter 라이브러리라서 그런듯)
기본 경로는 localhsot:{port}/swagger-ui/index.html이다.
http://localhost:8080/swagger-ui/index.html 확인해보자
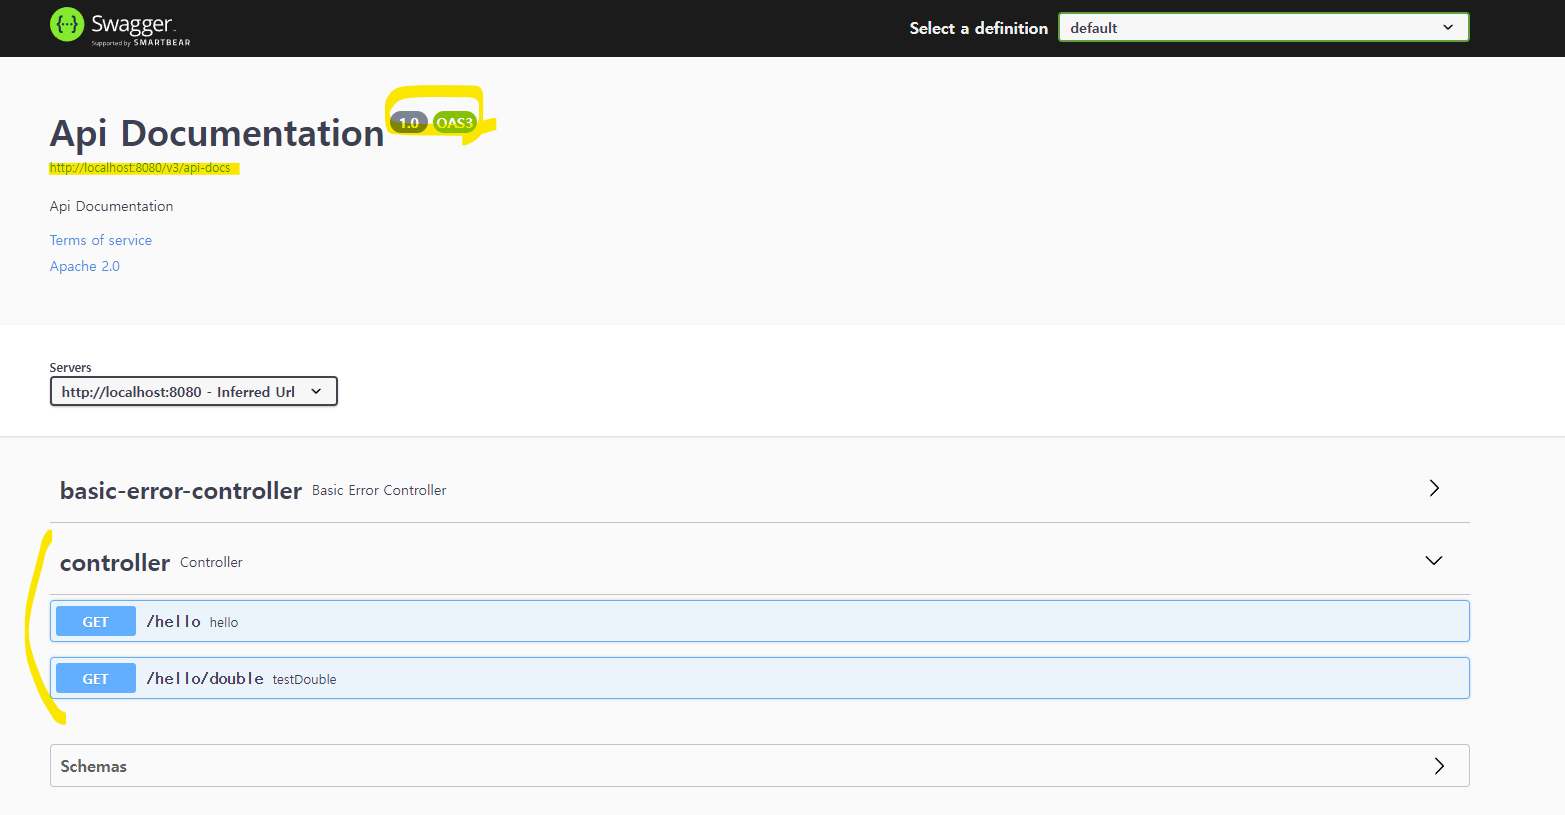
OAS version 3로 적용되었고, 우리가 만든 HelloController만 나오는 것을 볼 수 있다.
기본적으로 첫번째에 있는 하나의 컨트롤러만 보이도록 되어있는 듯 하다.
우리는 swagger V2를 쓸 것이니 설정을 해주자
Main클래스 아래에 이렇게 추가해준다.
@SpringBootApplication
public class SwaggerTestApplication {

	public static void main(String[] args) {
		SpringApplication.run(SwaggerTestApplication.class, args);
	}

    @Bean
    public Docket api() {
        return new Docket(DocumentationType.SWAGGER_2); //swagger 2로 설정
    }
}
Docket은 spring-fox에서 swagger를 초기화하는 주요한 configuration mechanism 이다.
Docket으로 swagger를 초기화한다고 보면 된다. version2로 초기화하면 아래와같이 버전이 바뀐 걸 확인할 수 있다.

그리고 아래와 같은 설정들을 더 해보자.
@SpringBootApplication
public class SwaggerTestApplication {

	public static void main(String[] args) {
		SpringApplication.run(SwaggerTestApplication.class, args);
	}

    @Bean
    public Docket helloApi() {
        return new Docket(DocumentationType.SWAGGER_2) //swagger 2로 설정 //swagger1, 2, openApi 3.0 이 있음
                .groupName("hello-api") //없으면 default
                .select() //세밀하게 설정할 수 있도록 하는 ApiSelectorBuilder를 반환
                .apis(RequestHandlerSelectors.basePackage("com.example.swaggertest.helloController")) //하위의 api를 가져옴
                .paths(PathSelectors.any()) // 허용할 path들 Any, regex, ant, any, none가능
                .build();
    }

    @Bean
    public Docket testApi() {
        return new Docket(DocumentationType.SWAGGER_2) //swagger 2로 설정 //swagger1, 2, openApi 3.0 이 있음
                .groupName("test-api") //없으면 default
                .select() //세밀하게 설정할 수 있도록 하는 ApiSelectorBuilder를 반환
                .apis(RequestHandlerSelectors.basePackage("com.example.swaggertest.testController")) //하위의 api를 가져옴
                .paths(PathSelectors.any()) // 허용할 path들 Any, regex, ant, any, none가능
                .build();
    }
}
이렇게 설정하면 아래와 같이 화면이 바뀐다.
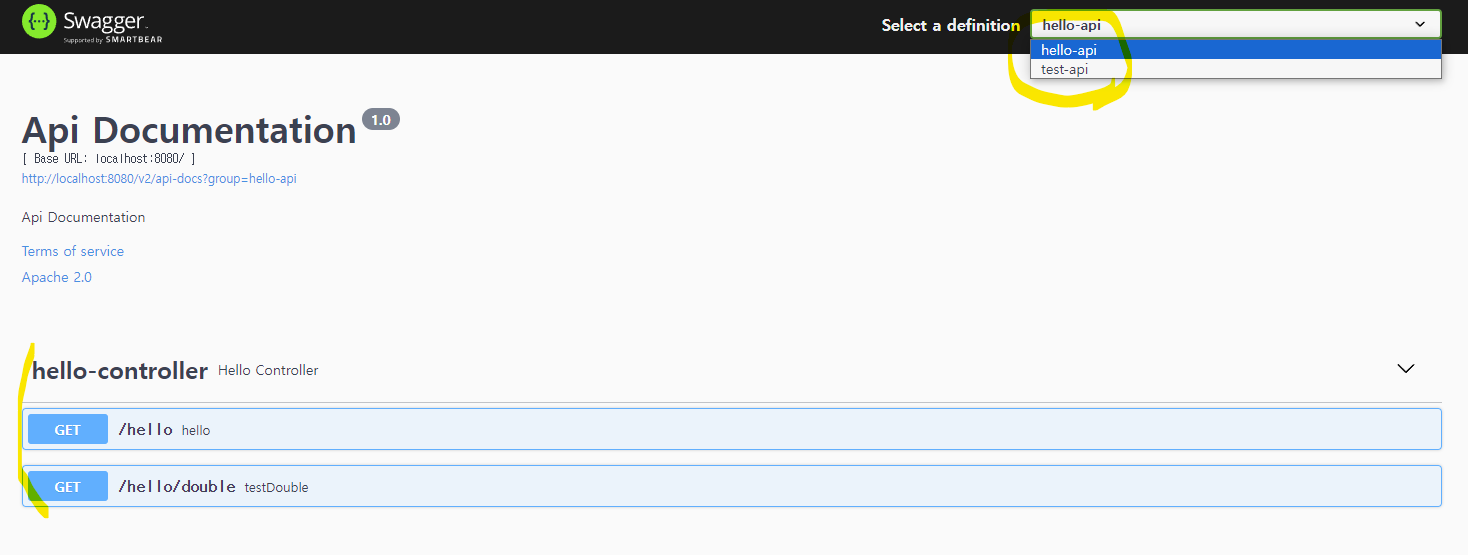
hello-api를 선택하면 helloController의 내용만 보이고, test-api를 선택하면 testController의 내용만 보인다.
뭘 설정한 걸까?
- hello-api라는 이름은 groupName으로 설정할 수 있다. 없으면 이름이 default다.
- select()는 세밀하게 설정할 수 있는 ApiSelectorBuilder를 반환한다. 세밀한 설정은 이 builder를 통해 할 수 있다.
- apis()는 어떤 api를 보여줄 것인지 설정한다. any, none, withClassAnnotation, withMethodAnnotation, basePackage가 가능하다. 예를들어서 RequestHandlerSelectors.any로 설정하면 모든 api를 보여주겠다는 뜻이므로 HelloController와 TestController가 둘 다 나올 것이다.
- paths()는 보안등의 이유로 특정한 path만 허용하고자 할 때 사용한다. regex, ant, any, none이 가능하다.
더 자세한 사항은 문서를 참고하자.
원래는 parameter등도 하나하나 작성해줘야 하지만, swagger에서 default값이 들어가 있어서 자동으로 감지되어 ui에 나타난다.
@ApiOperator @Param등 소스코드에 Annotation을 사용해서 swagger를 작성하는데, 이러한 내용들은 다음 포스팅에서 다루어보겠다.
참고
spring-fox github
https://github.com/springfox/springfox
GitHub - springfox/springfox: Automated JSON API documentation for API's built with Spring
Automated JSON API documentation for API's built with Spring - GitHub - springfox/springfox: Automated JSON API documentation for API's built with Spring
github.com
spring-fox documentation
https://springfox.github.io/springfox/docs/current/#introduction
Springfox Reference Documentation
The Springfox suite of java libraries are all about automating the generation of machine and human readable specifications for JSON APIs written using the spring family of projects. Springfox works by examining an application, once, at runtime to infer API
springfox.github.io
spring-fox demo
https://github.com/springfox/springfox-demos
GitHub - springfox/springfox-demos: Springfox demo applications
Springfox demo applications . Contribute to springfox/springfox-demos development by creating an account on GitHub.
github.com
https://aljjabaegi.tistory.com/668
[API documentation 자동화] spring boot swagger UI 적용 방법
API의 Document를 자동으로 제공해주는 swagger UI 설정방법을 알아보겠습니다. springboot 2.7.7 springsecurity gradle 1. dependencies 를 추가 /*swagger*/ implementation group: 'io.springfox', name: 'springfox-boot-starter', version: '
aljjabaegi.tistory.com
Failed to start bean 'documentationPluginsBootstrapper' 오류
https://www.inflearn.com/questions/230160/swagger-%EC%97%B0%EB%8F%99%EC%9D%84-%ED%95%A0%EB%A0%A4%EA%B3%A0-%ED%95%98%EB%8A%94%EB%8D%B0-%EC%97%90%EB%9F%AC%EA%B0%80-%EB%B0%9C%EC%83%9D%ED%95%A9%EB%8B%88%EB%8B%A4